热图可以聚合大量的数据,并可以用一种渐进色来优雅地表现,可以很直观地展现数据的疏密程度或频率高低。
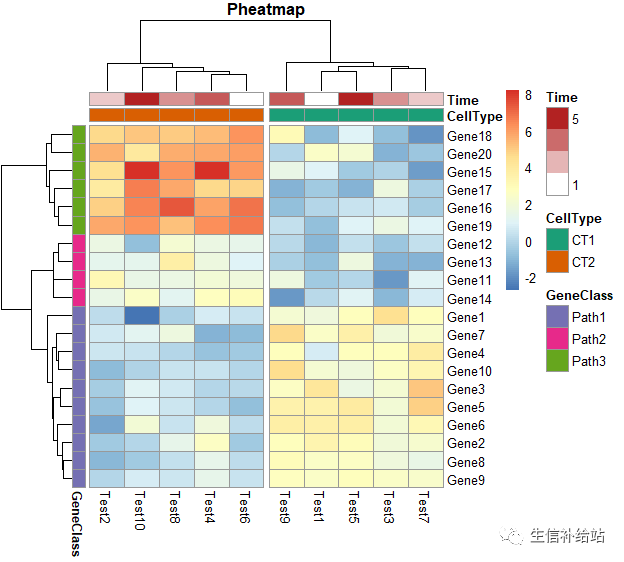
本文利用R语言 pheatmap 包从头开始绘制各种漂亮的热图。参数像积木,拼凑出你最喜欢的热图即可,如下图:
基因和样本都可以单独聚类,排序,聚类再分组,行列注释,配色调整,调整聚类线以及单元格的宽度和高度均可实现。
载入数据,R包
#R包library(pheatmap)# 构建测试数据set.seed(1234)test = matrix(rnorm(200), 20, 10)test[1:10, seq(1, 10, 2)] = test[1:10, seq(1, 10, 2)] + 3test[11:20, seq(2, 10, 2)] = test[11:20, seq(2, 10, 2)] + 2test[15:20, seq(2, 10, 2)] = test[15:20, seq(2, 10, 2)] + 4colnames(test) = paste("Test", 1:10, sep = "")rownames(test) = paste("Gene", 1:20, sep = "")head(test[,1:6])
绘制热图
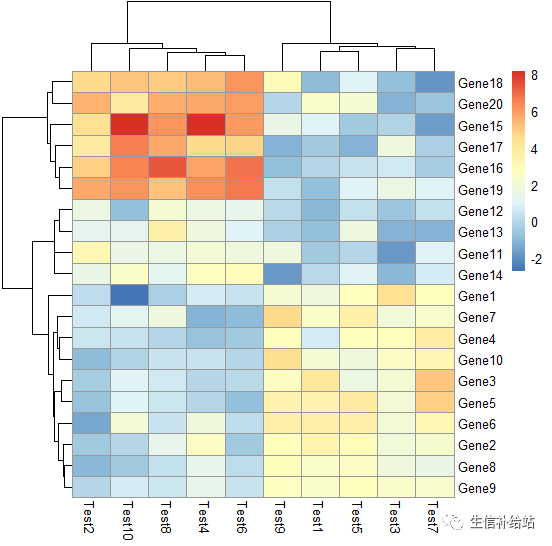
绘制默认热图
pheatmap(test)
基本参数
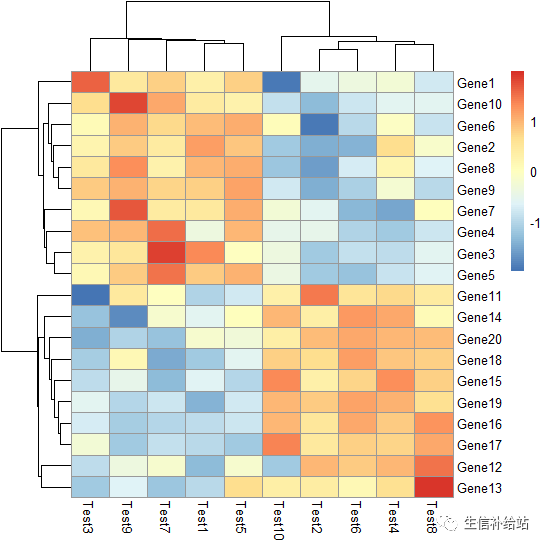
# scale = "row"参数对行进行归一化
#
clustering_method参数设定不同聚类方法,默认为"complete",可以设定为\'ward\', \'ward.D\',
\'ward.D2\', \'single\', \'complete\', \'average\', \'mcquitty\',
\'median\' or \'centroid\'
pheatmap(test,scale = "row", clustering_method = "average")
#表示行聚类使用皮尔森相关系数聚类,默认为欧氏距离"euclidean"
pheatmap(test, scale = "row", clustering_distance_rows = "correlation")
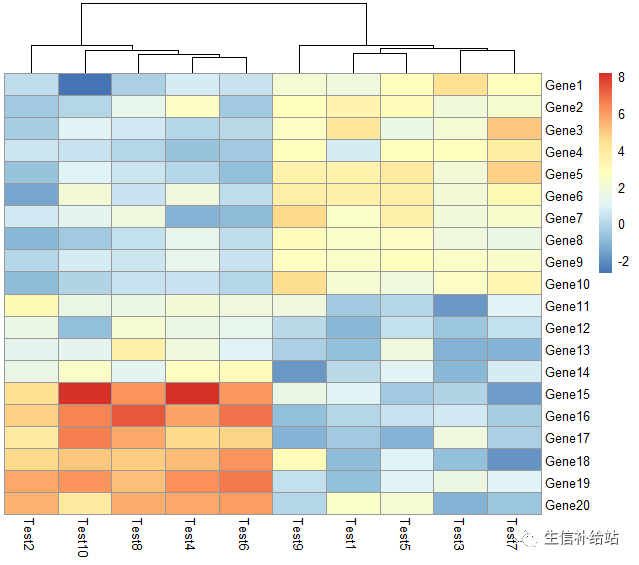
#行 列是否聚类,cluster_row ,cluster_col
pheatmap(test, cluster_row = FALSE,cluster_col = TRUE)
# treeheight_row和treeheight_col参数设定行和列聚类树的高度,默认为50
pheatmap(test, treeheight_row = 30, treeheight_col = 50)
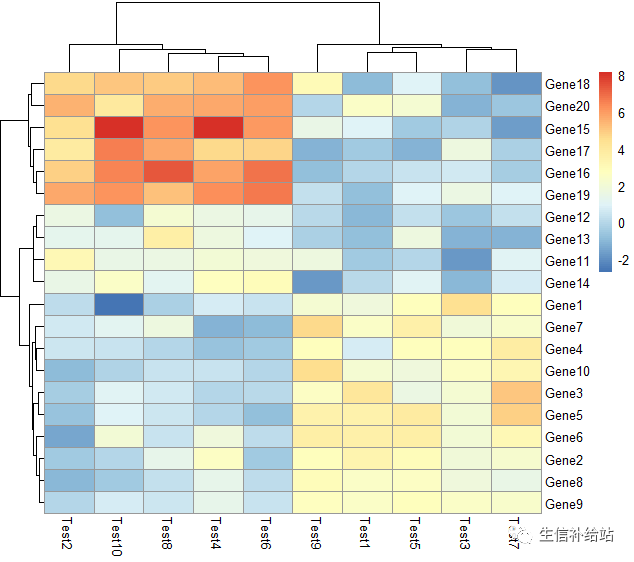
# 设定cell 的大小
pheatmap(test, cellwidth = 15, cellheight = 12, fontsize = 10)
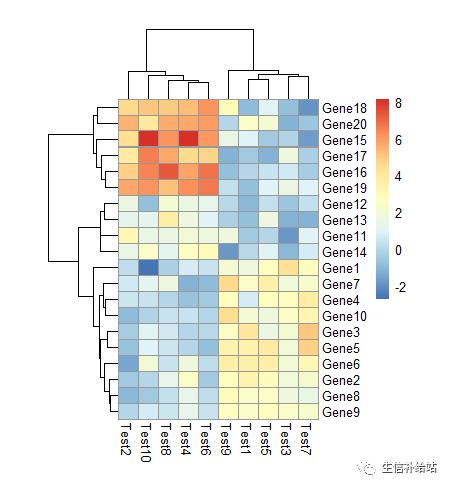
设定 text
热图中展示数值
# display_numbers = TRUE参数设定在每个热图格子中显示相应的数值,#number_color参数设置数值字体的颜色
pheatmap(test, display_numbers = TRUE,number_color = "blue")
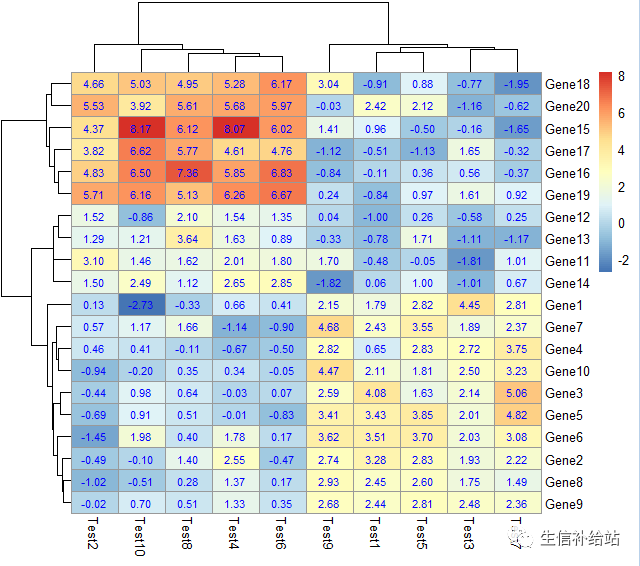
# 设定数值的显示格式
pheatmap(test, display_numbers = TRUE, number_format = "%.1e")
#设定条件式展示
pheatmap(test, display_numbers = matrix(ifelse(test > 5, "*", ""), nrow(test)))
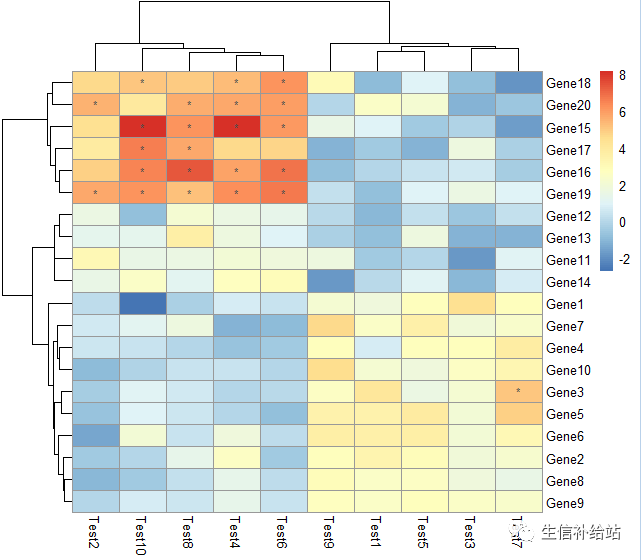
设置 legend
设定legend展示的值
#legend_breaks参数设定图例显示范围,legend_labels参数添加图例标签
pheatmap(test, cluster_row = FALSE, legend_breaks = -1:4, legend_labels = c("0", "1e-4", "1e-3", "1e-2", "1e-1", "1"))
#去掉legend
pheatmap(test, legend = FALSE)
设定 color
自定义颜色
#colorRampPalette
pheatmap(test, color = colorRampPalette(c("navy", "white", "firebrick3"))(50))
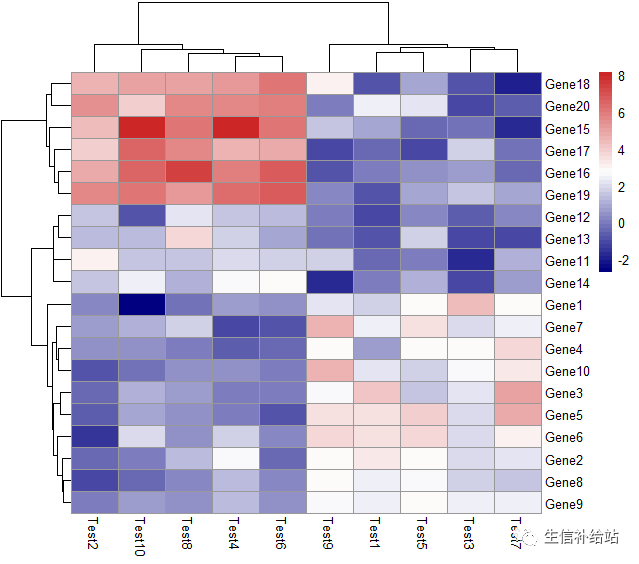
# border_color参数设定每个热图格子的边框色
# border=TRIUE/FALSE参数是否要边框线
pheatmap(test, border_color = "red", border=TRUE)
设定 annotations
# 生成行 列的注释
annotation_col = data.frame( CellType = factor(rep(c("CT1", "CT2"), 5)), Time = 1:5 )rownames(annotation_col) = paste("Test", 1:10, sep = "")annotation_row = data.frame( GeneClass = factor(rep(c("Path1", "Path2", "Path3"), c(10, 4, 6))))rownames(annotation_row) = paste("Gene", 1:20, sep = "")
#添加列的注释
pheatmap(test, annotation_col = annotation_col)
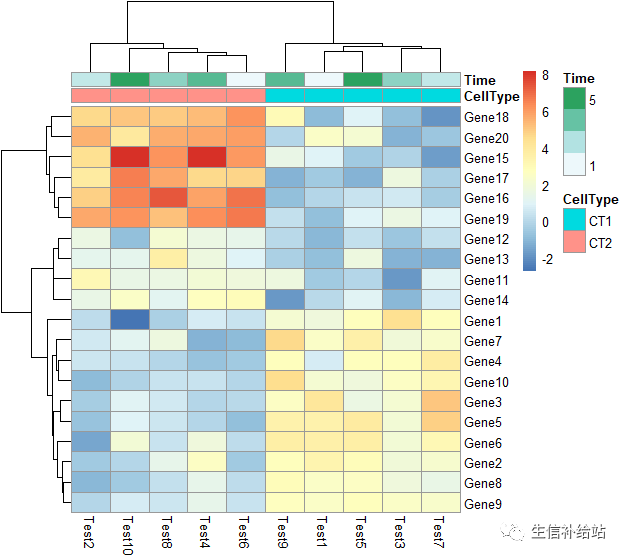
#添加行 列的注释
#angle_col 改变列标签的角度
pheatmap(test, annotation_col = annotation_col, annotation_row = annotation_row, angle_col = "45")
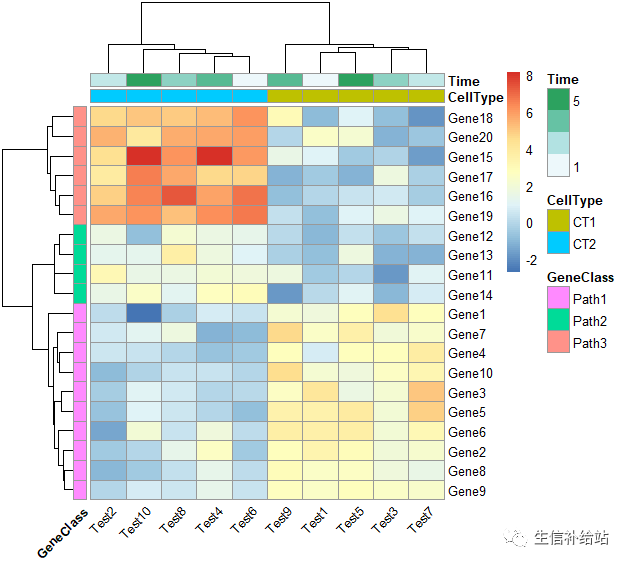
# 根据聚类结果,自定义注释分组及颜色
ann_colors = list( Time = c("white", "firebrick"), CellType = c(CT1 = "#1B9E77", CT2 = "#D95F02"), GeneClass = c(Path1 = "#7570B3", Path2 = "#E7298A", Path3 = "#66A61E") )pheatmap(test, annotation_col = annotation_col,annotation_row=annotation_row, annotation_colors = ann_colors, main = "Title")
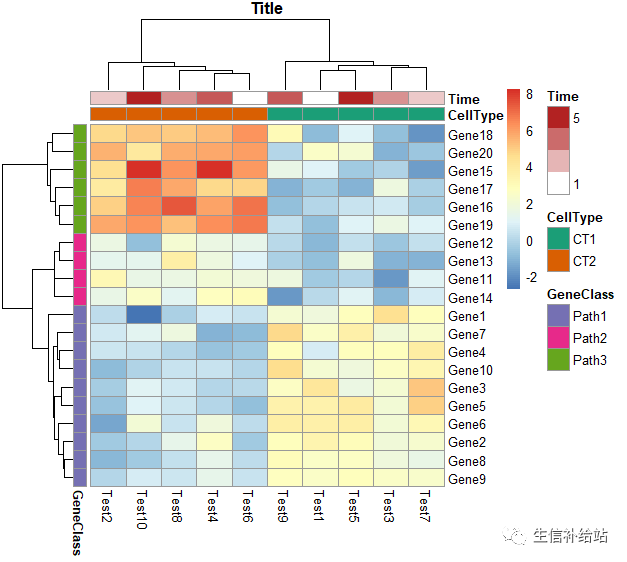
设定 gap
#根据聚类结果,设定行gap
pheatmap(test, annotation_col = annotation_col, cluster_rows = FALSE, gaps_row = c(10, 14))
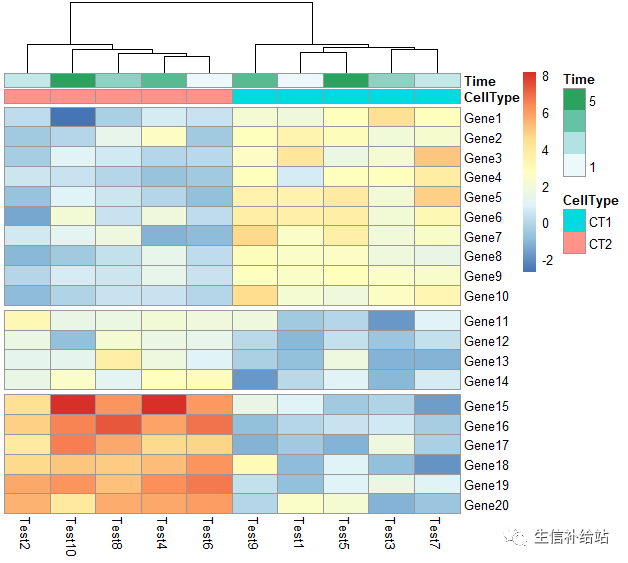
#根据聚类结果,设定列gap
pheatmap(test,annotation_col = annotation_col, cluster_rows = FALSE,cutree_col = 2)
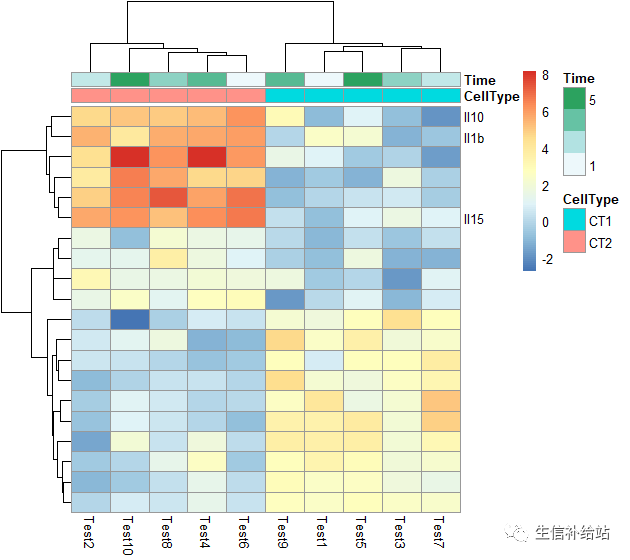
#展示行或者列的label
labels_row = c("", "", "", "", "", "", "", "", "", "", "", "", "", "", "", "", "", "Il10", "Il15", "Il1b")
pheatmap(test, annotation_col = annotation_col, labels_row = labels_row)
热图汇总
pheatmap(test, annotation_col = annotation_col, annotation_row = annotation_row, annotation_colors = ann_colors,gaps_row = c(10, 14),cutree_col = 2,main = "Pheatmap")

输出结果
A = pheatmap(test, annotation_col = annotation_col, annotation_row = annotation_row, annotation_colors = ann_colors,gaps_row = c(10, 14),cutree_col = 2,main = "Pheatmap") #记录热图的行排序order_row = A$tree_row$order#记录热图的列排序order_col = A$tree_col$order# 按照热图的顺序,重新排原始数据result = data.frame(test[order_row,order_col])# 将行名加到表格数据中result = data.frame(rownames(result),result,check.names =F)colnames(result)[1] = "geneid"#result结果按照热图中的顺序write.table(result,file="reorder.txt",row.names=FALSE,quote = FALSE,sep=\'\t\')
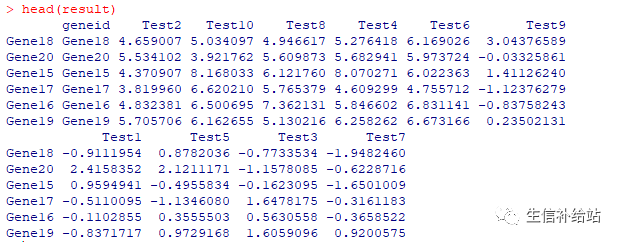
R的当前工作目录下即可查看热图的结果。
转自:生信补给站- 本文固定链接: https://maimengkong.com/image/1033.html
- 转载请注明: : 萌小白 2022年6月24日 于 卖萌控的博客 发表
- 百度已收录
